Monday, December 5, 2011

New Shipment 12/5/2011

Hey ya'll! Sorry for the no replies (as if I have any followers xD)

My computer died in October and I just got around to getting a new one! So look out !

Here is one of the new kits I got in the mail today! I'll be building it soon!!(after I get a new panel line marker) 
Here is a few shots of the box. Lovely box art once again. You can see Titus tearing through a UE suit. I believe it might be the Gafran unit.
 Side 1 shot
 Close up of Side 1. I like how they add the frames to the side. It's an nice technique.
The close of of Side 3 is picture of the model using one of it's signature attacks "Beam Lariat"


Here is side 2 and 4 they look the same. 
 Here are the parts

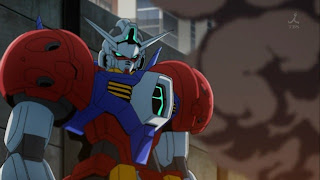
 You could see Titus in the Opening of Gundam AGE since episode one.


How did Titus come about? As most of you AGE watchers know, the thing that is special about AGE is the AGE System. Gundam AGE has the ability to scan battle data and make new weapons for AGE to use. DOTS Rifle was made to pierce the armor of the UE suits and Titus was made after a battle with the new UE suit Batqo.

After AGE-Normal was badly damaged it was re-fitted with Titus to combat Batqo's heavy armor and great defense


Sunday, October 23, 2011

Darth_Andrea Tips and Tricks

Well I have gotten a few questions about where to start with Gunpla. So many different scales different series and different Grades of kits to wade through.

So first and foremost you need to look at your budget Gunpla is a generally expensive hobby. There can be other costs involved depending on how far into it you wish to get.

Painting

If your going to paint your kits you have 4 options. Hand brushing, Spray painting with masking and Airbrushing (also with masking very often) and finally using Gundam Paint markers.

Given the totality of the various materials you will need for painting a cash sink of at least $100+ in brushes, dowels, a large hard foam block and bottles and cans of paint as well as gator clips and masking tape is to be expected.

Airbrushing supplies can be even more expensive. The average airbrush unit (Top Bottle Gravity Feed) can run anywhere from $150 to $350 depending on brand and unit complexity. A suction feed (bottom paint bottle) are generally cheaper and can be used with cans of compressed air with a adapter and can be bought for usually between $25 to $50 again depending on complexity.

Also since most people don't have a dedicated and ventilated room for painting most spray painting including applying primer will need to be done Outside.

Airbrushing can be done indoors but you will need to either buy a paint booth ranging between $200-$500 depending on model. Or build one which is cheaper. To build a paint booth you need the following supplies.

A Ventilation Fan, the type you would find in the ceiling of your bathroom for example. It's a Ducted vent so it's a fan enclosed in a box with a port for a tube ducting to attach to. These can be bought at most home improvement stores and range in price from $20 to $150 depending on Brand and complexity. Along with this you will need to a long section of flexible ducting like is usually attached to a clothes dryer again usually around $25-$35 depending on length and tube diameter.

You will need a large box either self built or something like a old entertainment center modified with a sturdy plywood backing (the method I used)

Finally you need a replacement air filter like used in home heating and air conditioning units. These range widely in price but generally go for the cheapest you can find in at least a 12 to 24 inch wide design.

Assembly is simple cut a hole in the back of your Box large enough for the vent fan to fit though and be attached, Note the side with the ducting port should be on the outside of the box, attach the vent fan with screws to the box and here you have a choice, you can hard wire the vent to a switch or simply use a extension cord and plug it into the wall when used, most have a plug already installed so no wiring will be required for this options. Then attach the flexible ducting to the port on the back and run that pipe out a window. Place the filter in front of the fan inside the box and your done.

Now lets talk about the kits.

Models

For beginners I would not recommend the larger more complex kits. Generally with a few exceptions Gunplay runs in these scales.

1/200 (2 to 3 inch tall) 1/144 (generally 4 to 5 inch tall) 1/100 (6 to 8 inch tall) 1/60 (9 to 10 inch tall) 1/48 (11 to 13 inch tall) Now these vary based on the size of the Gundam their based on.

Here is a pic of 1 design the Rx-78-2 the original Gundam from the 1979 cartoon in each of these scales.


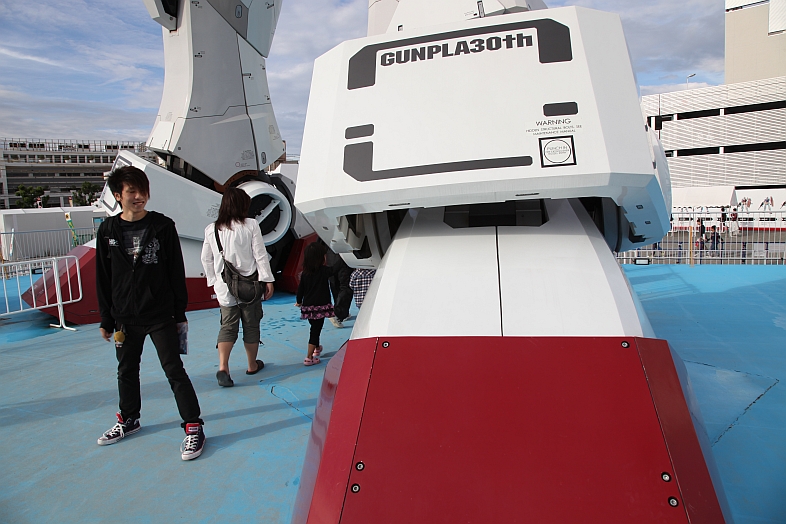
Now this unit is a 18 meter tall mobile suit. To give you a idea of what that means look at the following picture.


That is a adult male standing next to the 1/1 scale RX-78-2 Bandai built in japan a couple of years ago. Now given statistics show Japanese adult range 5 feet 5 inches tall as a general so notice the top of his head just barely reaches the top of the ankle joint.

But some other kits are larger even though they are in the same scale. The Unicorn Gundam for example in 1/144 scale is a head and shoulder taller.


And these are the kits I do recommend for starters. Generally kits in this size in High Grade or HG as is labeled on the box have little to no inner robotic frame have generally easy assembly and poseability.

Real Grade kits which are a fairly new line, Marked RG on their boxes, are basically 1/144 scaled Master Grades. Master Grades are 1/100 scale kits and have partial to full inner robotic frames to build. The RG kits are those in miniature.


These kits while very highly detailed for their size are not recommended for the beginner. with lots of very small parts and complex assemblies I don't think the beginner would be able to cope given the ease parts can break being this small.

Now if you are a beginner or someone just interested in seeing if you would like to get into Gunpla there are various outlets online to buy kits at really good prices.

If you would like some links feel free to PM me and I'll point you in the right direction.

I hope my ramblings help a bit and might tempt someone into the hobby  

Wednesday, September 28, 2011

GN - 005 Gundam Virtue

 So, as I started to watch Gundam 00 I fell in love with Virtue. That big design, he looks like a good tank or fighter type. That cannon and Shoulder Cannons.. Man! This gundam is awesome.


 The head was an interesting build. With the chin and everything.

 Here is the Cannon, I actually had a hard time figuring out how to open the cannons but I finally figured it out. Fun time posing him with it!


 A very stable suit and I love it. Shoulder Cannons are awesome

Saturday, September 17, 2011

GN-001 Gundam Exia


 This is the MG1/100 GN-001 Gundam Exia. This kit is where I tried out for the first time  Enamel washing
so it's not very good. But yeah! I've gotten a little better with it now.


WOW! Look at all those Runners! This sounds like a all nighter!


Tried to get those little details in the head. I think I did a good job :)


Here is a problem I had, when I was putting together the beam sabers, they broke!!! I have no idea why but most of them are broken....


Overall, I had a nice time building this kit! Other than the sabers this is another one I love. As much as I don't enjoy the show, I've yet to find a OO kit I didn't really really like!